
Table of Contents
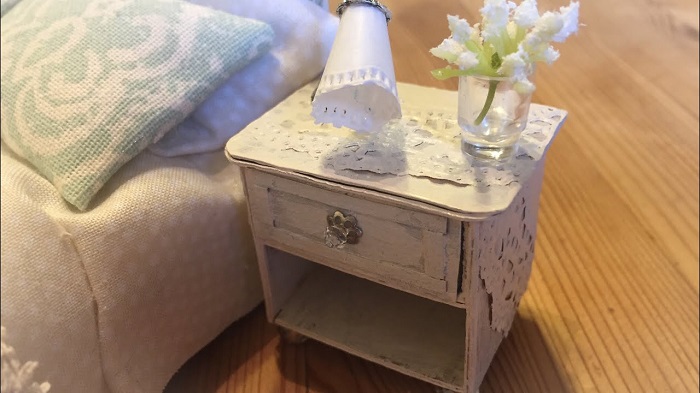
A soft vintage finish on a bedside table is created by layering diluted paint, selectively removing surface pigment, and sealing with wax to produce a worn, time-softened appearance rather than a heavily distressed one.
There is a subtle difference between simply distressing furniture and achieving a truly convincing aged finish. Most people focus too heavily on sanding edges, but the real character of a shabby chic piece comes from how the paint sits on the surface and how light interacts with it.
Instead of applying thick coats, professionals often dilute chalk paint slightly with water to create a wash effect. This allows hints of the original wood tone to bleed through, which mimics decades of gradual wear rather than sudden damage.
Another overlooked technique is directional wiping. After applying paint, lightly wiping in one direction with a lint-free cloth softens the pigment and creates natural variation. This produces a far more authentic result than aggressive sanding alone.
For a full practical walkthrough, you can also follow this detailed guide on how to shabby chic a bedside table, which complements the techniques explained here.
What Makes a Bedside Table Look Authentically Aged Rather Than Artificial?
Authentic ageing comes from uneven pigment distribution, softened edges, and layered finishes that replicate gradual wear patterns rather than harsh, high-contrast distressing.
The biggest mistake beginners make is creating contrast that is too sharp. Real antique furniture rarely has stark transitions between paint and exposed wood. Instead, edges appear softened, almost blurred.
To achieve this, use ultra-fine sandpaper only after applying at least two paint layers. This allows you to feather edges rather than strip them.
Another technique is dry brushing a second colour over the first. For example, applying a faint antique white over a sage base creates depth and tonal complexity that feels naturally aged.
Historically, furniture ageing was never intentional. It resulted from oxidation, sunlight exposure, and repeated handling. Understanding this helps guide where and how to distress your piece.
You can explore the origins of decorative ageing through https://en.wikipedia.org/wiki/Shabby_chic, which explains how the aesthetic developed into a design movement.
Which Paint Application Methods Produce the Most Natural Shabby Chic Finish?
Layered application methods such as wash painting, dry brushing, and stippling produce the most natural shabby chic finish because they introduce tonal variation rather than flat colour coverage.
Flat paint coverage is the enemy of authenticity. Real aged furniture has depth because the surface has been altered over time.
Wash painting involves thinning your paint and applying it in translucent layers. This creates a faded, sun-washed look.
Dry brushing uses minimal paint on the brush, lightly dragged across the surface. This technique highlights texture and mimics worn paint without removing material.
Stippling, which involves tapping paint onto the surface with a brush or sponge, adds micro-texture. When combined with sanding, it creates subtle inconsistencies that feel organic.
Combining all three techniques in a single project produces significantly better results than relying on one method alone.
How Do You Choose Colours That Age Well Over Time?
Colours that age well are those with low saturation and warm undertones, such as muted greens, chalky blues, and softened whites, because they replicate the effect of natural fading and oxidation.
Highly saturated colours rarely look convincing in a shabby chic context. Over time, real pigments break down and lose intensity.
A useful rule is to imagine how a colour would look after ten years of sunlight exposure. If it still appears bold in your mind, it is likely too strong.
Layering also plays a role. Using two related tones such as a warm white over a pale grey creates visual ageing without relying solely on sanding.
Historically, pigments used in older furniture were less chemically stable, which contributed to their faded appearance. This is why modern paints often need to be artificially softened.
For a cohesive bedroom setup, it helps to pair your piece with complementary furniture from the main Petalwood Interiors collection, ensuring consistency across the space.
Where Should You Distress a Bedside Table for the Most Realistic Effect?
The most realistic distressing occurs on high-contact areas such as drawer edges, corners, and handle zones, where repeated use would naturally wear down the finish over time.
Think about how the furniture is used rather than how it looks.
Drawer fronts experience constant pulling. Edges are exposed to knocks. The top surface sees objects being placed and moved.
These areas should show the most wear, but even then, the effect should be subtle.
A useful technique is to handle the piece as if it were in daily use before distressing it. Notice where your hands naturally rest and apply wear only in those locations.
Avoid distressing large flat areas randomly. This is one of the quickest ways to make a piece look artificial.
How Do You Seal a Shabby Chic Finish Without Losing Its Soft Texture?
Sealing a shabby chic finish requires wax or matte sealants that protect the surface while preserving its low-sheen, tactile quality.
Gloss finishes should be avoided entirely as they remove the softness that defines the style.
Clear wax is the most common choice. It enhances colour slightly while maintaining a natural feel. Dark wax can be used sparingly to deepen crevices and add shadow.
Application technique matters. Using a soft cloth rather than a brush creates a more even, subtle finish.
Interestingly, traditional furniture was often finished with natural waxes long before modern sealants existed. This contributes to the authenticity of using wax in shabby chic designs.
You can learn more about traditional finishing methods in https://en.wikipedia.org/wiki/Wood_finishing, which outlines how protective coatings evolved.
What Small Details Elevate a Bedside Table From DIY to Designer Quality?
Small details such as layered paint tones, subtle hardware changes, and interior drawer finishes elevate a bedside table from a basic DIY project to a refined designer piece.
The difference is rarely in the main finish. It is in the details.
Replacing handles with ceramic or aged metal instantly changes the perception of the piece.
Lining drawers with patterned paper adds an unexpected premium touch.
Even slightly rounding sharp edges with fine sandpaper before painting can make the piece feel more natural and less manufactured.
Another advanced technique is tonal edging, where a slightly darker shade is applied very lightly along edges to simulate accumulated wear and shadow.
These details are what separate a quick project from something that feels genuinely curated.
Key Takeaways
A convincing shabby chic bedside table is not created through heavy distressing but through layered finishes and controlled imperfection
Colour choice should prioritise softness and low saturation to mimic natural ageing
Application techniques such as wash painting and dry brushing create depth that sanding alone cannot achieve
References
https://en.wikipedia.org/wiki/Shabby_chic
https://en.wikipedia.org/wiki/Wood_finishing